Wednesday, February 9, 2011

Blue bird singing me a song

I'm currently working on a cross stitch pattern that will, at some point, be for my bathroom theme. I have most of the leaves done and I'm starting on the acorns now, next the bird.
Here is the pattern that I got from Crafts 'n Things magazine:


If you would like it in the original size, leave me a comment and your email and I will send it along.

I had company while I was working on it. Stu was watching the floss and enjoying the warmth.

I think I have a decent amount done, but I do it kind of randomly while hunting for jobs.


If any of you know a place I can find a cross stitch pattern with pinecones in it, will you let me know? I have been looking for a while with no luck.

Thanks!


Wednesday, January 26, 2011

Felt Flower Ball

I found this picture on The Idea Room for felt flower balls. She found it from Design*Sponge.
Its very easy to make and can be made into other things besides a ball. Design*Sponge made a wreath with this idea, so don't feel confined to one set form.

Supplies needed:

Felt- about 16 (Hobby Lobby sells them 4 for a $1, so its about $4 in total)
Pins
Ribbon (about 8 to 12 inches)
Styrofoam ball (sizes can vary, but the larger the size the more felt you need)
Scissors (small or large depends on how much pain you want to be in)
Circle for cut out
Marking pencil (or pen)

Items I used:


I got the pencil for it, but turns out felt sucks to write on, so I used a pen to make it easier to see.

You can use a cup, or canning top. If you use black you could use a canning top and stamp it on a white Ink Stamp to leave trace cut outs. Just have to be careful to make sure no white is left once you cut it out. Same thing for me with a dark pen on the blue felt.


First take any wrapping off styrofoam ball. Keep the ball away from the felt, as the styrofoam has a way of shedding.

Second I found it easiest to fold my felt in half  horizontally and then in half again vertically. Tracing now will give you 4 circles and less work. I used a larger scissors to cut them out as it was thicker.
*Tip* Will cause pain in the hand if you use a small scissors for this part)
Once you have cut out the once traced circle you can unfold the felt. If you trace a circle in between the two cut outs on the left and right upper corners you will be able to get another 4 circles, and therefore not wasting too much of the felt.
*Tip* I cut squares out of the extra felt to use for backing on pins I create. Waste not want not. No point in throwing away good felt.

I would say do as many as you feel your hand can take. I did a about 16 at a time to rest my hand.
Take a circle and fold it in half. Then fold it in half again. This will be what is pinned to the ball.

 
Once you have folded it over twice, place a pin through the tip at the bottom and place into the ball.

Continue to do this until the entire ball is covered. Do feel that you have to cram them together. Leave a little open space, so that they felt petal (folded piecing being pinned down) can spread out a little. Just be sure to not have any of the styrofoam showing through.


Once completely covered pick a location you want to pin the ribbon from which it will hang. Then cut a section of ribbon. Mine was about 12 inches long. You can pick longer or shorter depending on how you want to hang it.
Now take on end of the ribbon and pin it to the ball. I used two on each end to make it more secure. Do this to the other end of the ribbon.
*Tip* Try going at an angle to create a more secure pinning.
*Tip* Pin as close to the over end as to not push aside the felt petals.

You now have a finished Felt Flower Ball.


Give it a shot! Let me know how it goes. I would love to see them. Don't be afraid to be creative with them. I will be doing another one in two color combos and one with glitter felt.

Sunday, January 16, 2011

Check out Craftaholics silhouette project

Check out Craftaholic Anonymous' newest project using Sihouette!


****DISCOUNT ALERT****
Deal #1: Buy a Silhouette SD Digital Cutting Tool and get:
  • 2 rolls of premium vinyl
  • 1 roll of transfer
  • AND the Home Décor CD {which is full of awesome designs you can cut to decorate your home with} 
*that's a $395 value for only $225!!!*
 holy smokes! that's a rockin' deal! the Silhouette SD itself retails for $300 by itself, so this deal is A*MAZING! 

***if you have any questions about the Silhouette SD that i have not answered in this post, please feel free to email me! like i said earlier, i've owned a Silhouette SD for a year and a half and used it a bunch.

Deal #2 all Premium Vinyl is 25% off! i think i'm going to have to stock up. after using it on my headboard, i am totally sold on Premium Vinyl! higher quality and easier to use than regular vinyl.

to get these killer deals, use Promo code: CRAFT {easy to remember, huh? ;} these deals are only available Jan. 17-22, so i recommend acting quickly!

Quilt project idea

I had planned to start working on decorating my bathroom before I lost my job. However, I still want to do the project I had in mind before everything happened. I wanted to do a garden theme in my bathroom. My shower curtain is actually what inspired it.
All the pastels reminded me of Spring and new life. Then I found these bird pictures at the ARC store and it started to all come together.

So I want to make a 4x4 square quilt and frame it, or just back it and hang it. (Haven't decided for sure yet)

I won't make it very big, but that's the lay out I want to do.
Fabric number 1 is

Fabric 2 is


Fabric 3 is


Fabric 4 is


Fabric 5 the center is


Fabric 6 is going to be the surrounding color. I haven't decided if I will use the right side (it has glitter on it) or the wrong side, as I actually like how the wrong side looks. Which would you choose?


It should be pretty quick and easy to put together once I get the squares all cut out. And like I said it won't be very big overall, so the individual squares will need to be relatively small.

This is the general lay out. Obviously the corners and sides will repeat, but that's the idea. I think it should be pretty when its all put together.

The upside was that JoAnne had a large sale on fabric and so two of the fabrics were 40% off and the rest was 30% off, and the glitter fabric was actually 70% off. Pays to wait for sales. I also had a 50% off coupon, which I used on a fabric pencil.

I will update when its done.

Clearances are worth checking over

I love wandering the clearance section. After applying to about 25 jobs all morning long I needed out of my apartment and off my a**! My favorite store is closed on Sundays, so I went to Michael's and I knew they had added more stuff to their clearance section. I found a bunch of note card patterns for $.25 each! I spent $3.75 for 15 note card packs. Score!

Now this might seem a bit much for most people. I mean 15 packs? There is a story behind this:

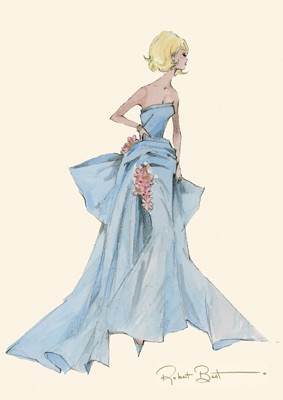
Well last year for my friend Sarah's birthday I got her a package of various vintage Barbie note cards.


 These are some samples of the Barbie cards I got her.  This gift reminded her of when we were in school together and we would write notes to each other through the entire day to entertain ourselves. Because she has various ones and I had a package of glitter images of Paris note cards we started writing notes to each other again. Since we have various ones we would send a new card one each time. This lead to us wanting to find new types to send to each other. At Christmas I found another set of Barbie ones for her, as she is nuts about Barbie.

Of course today when I found these note card packs for $.25 I was excited because this would give me new images to send. Several of these cards belong to a set.


These are the Shabby Chic set. Very vintage look, which is what I love about them.


This says "The Queen has arrived." I like the saying because it kind of cracks me up. There was other cards to this set, but they were pretty stupid looking, so I just got this one.
This set has foil for the detail lining. It even had a stamp that matched them, which is different but cool.

I love the detail on these ones. Reminds me of Spring and the joy of new growth. Very pretty.


Can't tell me that $3.75 is worth what I found. Very proud of these finds.