Pearl Heart Necklace
Supplies: *package of white flower patterned pearls
*10 white gem stones (or white/clear beads, which ever you prefer)
*Large heart pendant
*bead wire (.18mm in white silver)
*Large link chain
*Toggle clasp
*Large jump rings (4)
*clamp beads (3) #1 (white silver)
*needle nose pliers
*clamp pliers
*wire cutters
*Measuring tape
*Tip 1- Plan It Out* As with all jewelry designs I laid out the design on my bead board before I started doing anything. Had to try out different style gem stones to see which one matched best, as I did not buy any of the beads at the same time. This also includes making sure the clasp and clamp beads match the color pallet.
*Tip 2- Measure* Always measure for each project to make sure the lengths that fit best are correct. This is important when making items for other people. Once you have done them enough times you will know the required lengths and can skip this step.
Steps:
- Measure out the length of bead wire you will need for the one side length and then give yourself about 2 inches to loop back through at the ends. Use wire cutters to cut correct length.
-Take a pair of need nose pliers and open a jump ring. Slide the jump ring onto one side of the toggle clasp and close the jump ring.
*Tip 3- Tight Loops* Try and keep the loop as tight as possible to keep from having a big gap. This can be done by holding one end of the bead wire with a needle nose pliers and then taking the other end of the wire and pulling it tighter. Keeping it tight keeps the wire from rubbing. This is also why using a jump ring to attach to the clasp is important, as the wire attached to the jump ring is not going to move around much if its pulled tight.
- Take a clamp and thread it on the bead wire; then slide the bead wire through the jump ring attached to the clasp. Loop the bead wire back through the clamp bead. Use the clamp pliers to clamp the bead in place. This should allow for a loop to hold the one end in place. (see
*Tip 3*)
-Thread on the patterned pearls and gems in the order of the design you picked ahead of time (see
*Tip 1* )
-Continue this until you have the length you determined earlier. (see
*Tip 2* )
*Suggestion 1* Doing one clamp bead at the end to make sure everything stays tight and then another to create the loop is
NOT required. You can choose to use only one clamp bead, just be sure to keep the beads together tightly enough to not end up with large gaps when you wear it. I do it for both ease and strength. Beginners can do this until they get better at re-threading the closure clamp.
*Tip 4 - Consider Material and Purpose* You must always be aware of the type of give and strength your supplies have or you could end up with breaks, scrapping, and no flexibility. The heavier the wire the less bend and flexibility it has. String the beads too tightly together and some will rub together and break. String them too tightly and the beads will bunch and not bend well around your wrist. Some times you need to allow for "give room" with bracelets in order to get the bracelet to wrap.
-Once you have finished your design for the length, slide on a clamp and use the clamp pliers to secure it in place. (see
*Suggestion 1* and
*Tip 4* )
-Take another clamp bead and thread it on first, then slide on the other jump ring, then thread the wire back through the clamp. Now tighten the wire until you have a small loop. Be sure that the jump ring stays in the loop you create. Use the clamp pliers to close the clamp when you have the loop the size you want. (see
*Tip 3* )
-Take a wire cutters and clip off the extra wire as close as possible to the last clamp bead. If the wire is bend-able enough and the bead holes are big enough you can thread the extra wire back through the beads instead of cutting it. (Set this aside for now)
-Measure out a length of large link chain for the other half of the necklace.
-Use the needle nose pliers to open a link to create the length you just determined.
-Take the needle nose pliers and open the jump ring you just put on the finished end of the strand. Slide on the heart pendant first, and then slide on a link from the chain you just created. Close the jump ring.
-Take a needle nose pliers and open another jump ring. First slide on the open end of the chain you created. Then slide on the other end of the toggle clasp and close the jump ring with the needle nose pliers.
-That will finish off the necklace.
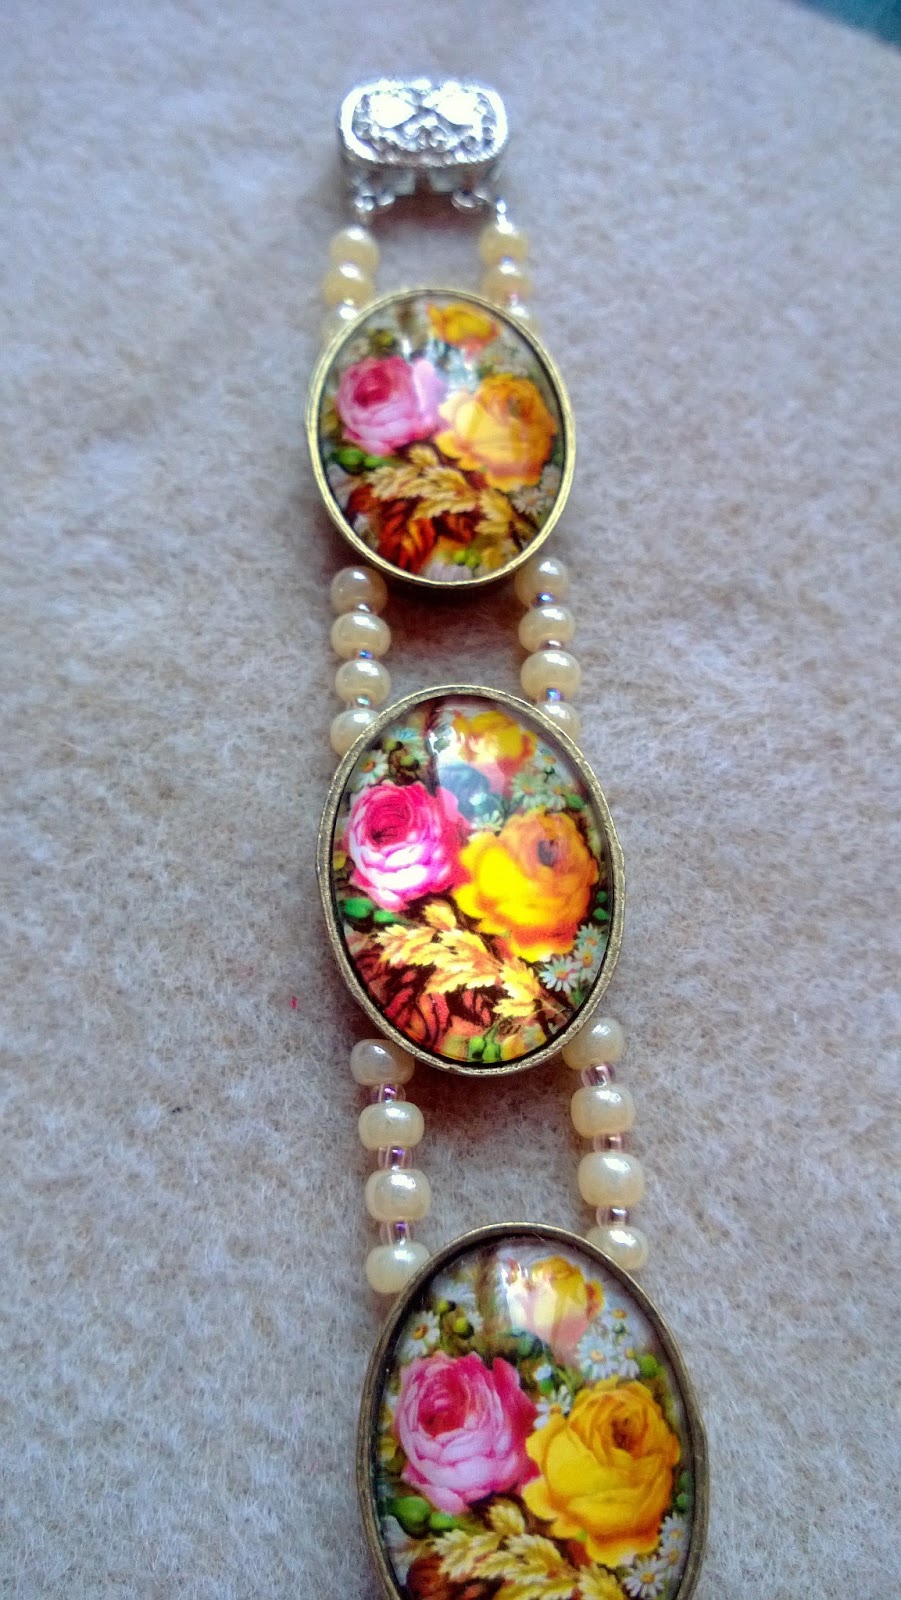
Pearl Bracelet
Supplies: *Strand of Flower patterned pearls
*12 white gem stones (or clear beads, which ever you prefer)
*bead wire (.18mm in white silver)
*Lobster claw
*jump rings (2)
*2 head pins (white silver)
*clamp beads (3) #1 (white silver)
*half inch of small link chain (white silver)
*needle nose pliers
*Round nose pliers
*clamp pliers
*wire cutters
*Measuring tape
*Tip 1- Plan It Out* As with all jewelry designs I laid out the design on my bead board before I started doing anything. Had to try out different style gem stones to see which one matched best, as I did not buy any of the beads at the same time. This also includes making sure the clasp and clamp beads match the color pallet.
*Tip 2- Measure* Always measure for each project to make sure the lengths that fit best are correct. This is important when making items for other people. Once you have done them enough times you will know the required lengths and can skip this step.
Steps:
- Measure out the length of bead wire you will need to fit around your wrist comfortably and then give yourself about 2 inches to loop back through at the ends. Use wire cutters to cut correct length.
-Take a pair of need nose pliers and open a jump ring. Slide the jump ring onto the end of the clasp and close the jump ring.
*Tip 3- Tight Loops* Try and keep the loop as tight as possible to keep from having a big gap. This can be done by holding one end of the bead wire with a needle nose pliers and then taking the other end of the wire and pulling it tighter. Keeping it tight keeps the wire from rubbing. This is also why using a jump ring to attach to the clasp is important, as the wire attached to the jump ring is not going to move around much if its pulled tight.
- Take a clamp and thread it on the bead wire; then slide the bead wire through the jump ring attached to the clasp. Loop the bead wire back through the clamp bead and then use the clamp pliers to clamp the bead in place. This should allow for a loop to hold the one end in place. (see
*Tip 3*)
-Thread on the patterned pearls and gems in the order of the design you picked ahead of time (see
*Tip 1* )
-Continue this until you have the length you determined earlier. (see
*Tip 2* )
*Suggestion 1* Doing one clamp bead at the end to make sure everything stays tight and then another to create the loop is
NOT required. You can choose to use only one clamp bead, just be sure to keep the beads together tightly enough to not end up with large gaps when you wear it. I do it for both ease and strength. Beginners can do this until they get better at re-threading the closure clamp.
*Tip 4 - Consider Material and Purpose* You must always be aware of the type of give and strength your supplies have or you could end up with breaks, scrapping, and no flexibility. The heavier the wire the less bend and flexibility it has. String the beads too tightly together and some will rub together and break. String them too tightly and the beads will bunch and not bend well around your wrist. Some times you need to allow for "give room" with bracelets in order to get the bracelet to wrap.
-Once you have finished your design for the length, slide on a clamp and use the clamp pliers to secure it in place. (see
*Suggestion 1* and
*Tip 4* ) (set aside for a second)
- Use your needle nose pliers to create a half inch length of chain.
- Grab your wire again. Take another clamp bead and thread it on first, followed by the half inch long chain you just created. Then thread the wire back through the clamp. Now tighten the wire until you have a small loop. Be sure that the chain link stays in the loop you create. Use the clamp pliers to close the clamp when you have the loop the size you want. (see
*Tip 3* )
-Take a wire cutters and clip off the extra wire as close as possible to the last clamp bead. (If you didn't use two clamp beads you can do this next part.) If the wire is bend-able enough and the bead holes are big enough you can thread the extra wire back through the beads instead of cutting it.
-Thread one of the two remaining white gem stones onto the head pin.
-Use the round nose pliers to create an eye pin loop above the gem. Cut the remaining pin with the wire cutters. (Must know how to make an eye pin loop.)
-Repeat the last 2 steps with the remaining white gem stone.
-Use the needle nose pliers to open the jump ring that has the lobster clasp attached. Slide on the two eye pin loops you created, then close the jump ring.
-That will finish off the bracelet.
Heart Pendant Earrings
Supplies:
*Heart pendants- small
*Earring 'type' (2) (I used eye hooks)
*needle nose pliers
- Use the needle nose pliers to open the loop at the end of the earring hook and slide on the heart pendant. Close the loop.
-Repeat last step to finish second earring.
- This will finish the earring set.
You now have an entire set of heartfelt joy.