Saturday, January 14, 2012

Button up your bag

This particular design was actually something I wanted to do on a pillow (and still will), but I thought it would look really cool on a bag. I wanted a stronger bag to hold all my knitting needles. The canvas material was perfect, but so boring and we all know boring is just lazy. Crafty people do not tolerate boring... and why should we?!


Supplies:

- Canvas bag
- Buttons (be best if they were different sizes, colors, and button holes)
- Marking pencil
- Thread
- Needle
- Camera (is helpful)


You will need to have a completed bag for this project. If you need directions on how to make a simple bag check out my directions for this bag.

Lay the finished bag out on a flat surface.

Open the bag of buttons and random lay out the buttons in a tight bunch at one corner and start to stagger the buttons as you move down the bag towards the other corner.


This is where having a camera close at hand is helpful. It helps you remember what it looked like.

Take the marking pencil, start at the lightest arrangement corner, and use the sharpened tip to mark the button holes so you have a template for placement.


The marking pencil will need to stay sharp as possible in order to fit in the button holes. I had buttons with two holes, 4 holes, and large holes so it was easier to tell which button was going where. If you don't have different ones the picture you took will help you sew on the buttons.

I started sewing the buttons on at the bottom. I rolled the top of the bag down so that it was easier to thread the needle in and out. It take some time to sew all the buttons on depending on the sizes and amount you used. Took me about 2 hrs to sew them all on... mostly because I had to get up and stretch out my back.

When you are done it comes out pretty cool. (and hopefully matches your original layout)


This plain dull bag is now an interesting and colorful creation. Personal touches are always better I think. I used this bag to hold all my knitting needles, as I have way beyond several.

I hope you will give this unique design a try and let me know how it came out!


UndertheTableandDreaming

Friday, January 13, 2012

Protect the Knit!


I made this lovely bag to hold my current knitting project. (and all future project thereafter)

Supplies:
-Quarter yard of chosen material (mine is 'painted' canvas)
-Scissors
-Pins
-Thread
-Sewing machine
-Measuring Tape
-Marking pencil

*Tip 1 - Wash Material* You should always wash your material ahead of time. This removes any risk of shrinking later and allows for any color bleeding. You may need to iron the material after drying if its very wrinkled.

*Tip 2 - Patterns Matter* Always look at the direction of the pattern on your material. If the direction of the pattern is specific you MUST sew pieces together with the pattern in the right direction.

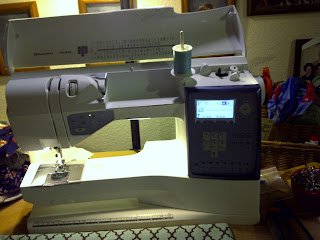
*Suggestion 1 - Details* Your sewing machine may have more interesting sewing patterns you can choose to use like mine, but I like find its easier to do fixes on simpler stitches if the need arises.

- Lay the material out flat and cut the desired width for the handles. I did about 6 inches wide and the full length of the material. Set aside this material for later.

- Flip the material so that the wrong side is facing outward.

- If you wish you may cut along the fold and sew the bottom together. Or you may leave it alone and use that as the bottom. The pattern will dictate if this is required. See *Tip 2*.

- Pin the two wrong sides together on one side of the material and sew together.  Do not sew all the way to the top. This creates one side of the bag.


- Pin the other side together and sew together. Do not sew all the way to the top. This creates the other side of the bag.

- Making sure to not sew all the way to the top of the bag allows for you to fold the top half down half an inch and pin into place. The right side of the bag will show in the half inch fold, which is correct. This can now be sewn. This creates a smooth edge for the top of the bag. This will be the edge you sew the handles onto. Do this for both sides, making sure to NOT sew them together.


 - Set aside the bag for right now.

- Grab one the strips of material you cut for handles. Lay the wrong side upright and fold half an inch  (or small depending on how wide you made the strips) and pin in place. Sew this in place.  Do this for the other side of the strip. The right side of the material will now be visible on both sides.


- Repeat last step for the other strip of handle material.

- Grab the bag material you set aside and measure the top of the bag. This will help determine the proper spot to sew on the handles. My bag was about 12 inches long, so I chose to sew the straps 3 inches from one side and 3 inches from the other. Use a marking pencil to mark the spot. Then pin the handles to those spots. Do this one side at a time, makes it easier.

- Sew on the handle one at a time. I like to sew a little before and little after the handle to make it more secure. I also try to sew along the first stitches you made when you did the top of the bag.


-  Repeat last two steps for the other handle. This time will be easier to pin the handles in place, as you have a guide in place on the other side. Be sure to make the handle loop the same size. (i.e. don't make one handle stick up higher or lower than the other.)


- You may iron down the edges were you sewed the sides together to make then lie flat.


Now you have a completed bag for your knitting projects that need storing till they are completed. Your projects will be safe from mishaps... like say kitty claws making snags, or kitties chewing your yarn in half.

Go Green!... or pink, or striped!

Like so many people I like to use the reusable canvas bags instead of plastic when possible. I tend to forget a lot, but been making more of an effort to always use them. Its easier now that I have a few more (I tend to buy one most times I'm at a store that sells them.) I got a little sick of paying for them. Ironically instead of being cheaper they actually seem to be going UP in price. That was rather annoying to me.

I decided to keep a mental note to look for material that I thought would be a good fit to make some bags. I started looking at just anything I thought would be thick enough, then finally realized that canvas would be best. However this realization did not occur until after I had made my first bag.
This first bag attempt was from flannel and it was actually something I had already. I was going to sew the edges and make it into a baby blanket, but given I was knitting one I decided to just keep it for something else. This was more or less a trial run. I wanted to make the easiest bag possible. This basically meant I sewed the two sides together, leaving the bottom fold alone, and sewing the top edge back and doing handles. However with this particular fabric I should have paid attention a little more....

The pattern ended up side ways by doing it the super easy way. OOPS. OTHERWISE the bag came out fine. I learned a few things both good and bad. Plus its still a perfectly usable bag. Right now its what I am using to hold my chunky yarns.

I have since been waited for sales on canvas material. Whenever I find a coupon for like 50% or 40% I have started using that to buy the material, because it always seemed to me to never be on sale! I only buy like half a yard or a quarter yard depending on the original price. I was having a hard time finding just the plain canvas material, but found lots of the "painted" canvas. That's when I decided I would use that for bags, but not the type I had originally intended.


I found a few really nice looking canvas material. I was able to find some plain canvas (finally), so I will be getting more of that soon for the original planned project idea.

I wanted these bags for use in holding my yarn and other supplies. I made the 'painted' canvas bags the same way I made the flannel bag, but this time the material's pattern didn't matter. (hence why I sewed them that way) I now have several bags. I made 3  big plain canvas bags and used the design of the ones that Hobby Lobby sells because I liked the pockets. (easy and cheaper!)


The pockets were a bit of a pain, but Mom helped me. She gave me the material for the handles. I can't think of what its called all of a sudden...ugh I hate when I can't recall things. I wanted the plain canvas ones to be flat on the bottom, so Mom showed me how to do it, but I did it on the outside and she said its easier if I do it on the inside.

So now I have bags to hold my yarn, my needles, my current knitting projects, my cross stitch supplies, and my fabric for my flowers... which seems to have multiplied over night!


I best be getting on top of them! I think if I made one flower from every type of fabric I had I would have a flower to wear everyday for about 5 or 6 months! That's not even including the material that is a yard or more. (I only buy a quarter yard for the flowers)


Thursday, January 12, 2012

Fall-ing flowers

I find it is simpler, less expensive, more personal, and funnier to make my hair clips and pins myself. I tend to do my fabric flowers for such things. I get compliments on them all the time. The first one I ever made was more my mother, which she has pinned on her winter coat. She is always telling me how people enjoy it and give her compliments on it. Makes me feel really good knowing people enjoy them, even from just looking at them. (Still working on possibly selling some things online.) Plus I think nit gives my Mom a sense of joy to praise me and my creativity.

As the season change I like to change with them. The summer cloths get put away and the warm sweaters and blankets come out. Makes you feel more connected. One way I like to do that is have items to wear as the seasons change. I mean if my wardrobe changes, why not other things?

I know the season has passed, but its always a good time to share and teach. I made a few fall and Halloween flowers to wear at work and for my hair. I tried a few new ideas and some just didn't work at all.

These flowers are based off the same directions and template as shown in my Fabric Flower Pins post. The template is available in that post. I have sense made a few different ones on my own. I will try and get those scanned in so you can enjoy them too.

I found several fabric choices, so I enjoyed up with quite a few.


One difference from the original Fabric Flower Pins post is that I created a felt slide on that allows for the flower to be either on a head band, used as a pin, or used as a clip for in your hair.


This design difference allows for more uses and more enjoyment. You use the same directions, but instead of sewing on a pin or glueing on a clip, you sew the edges of two pieces of felt together, allowing for the head band/clip/pin to slide through. I chose to glue the edges (lightly) after I had sewn them just to make it more secure and longer lasting.


One thing I was able to do the standard template was shrink it. This allowed for me to make a more detailed flower. This picture shows a more fuller, multi-layer flower.


This is the small flower from the template that is available on the Fabric Flower Pins pos, just shrunk a little.


Wicker Wonder

I'm not sure if I ever posted this.... if I have just bear with me.

I have a wicker wreath that I decorate some seasons. I like to have a friendly reminder within view. This wreath hangs in my room.

This was my Spring version:


This was the fall version:


 This is the Christmas version, which I have yet to change because I am not sure what to do yet:


I added a few things to it about a week before Christmas, because it seemed a bit boring.


Any suggestions on how to do it change it now? I don't feel like doing anything spring like because its seriously NOT spring like here. Just don't feel as though it should stay so Christmasy.

I did do a wreath for Mom that was on the front door. This has a more tradional feel to it. Mom is big on more standard looks. Mine was more "new age" as she would say.


There was another one that I did for outside, but my absent-mindedness was in full effect and I spaced it. I was not  very on top of things. Still trying to make my way out of that cloud. (Hence the post of Christmas wreaths!)