Showing posts with label seed beads. Show all posts

Sunday, July 14, 2013

Blue butterfly bracelet


Blue Butterfly Bracket Bracelet

Supplies:

*2 strands of blue butterfly brackets
*tube of  translucent light blue beads(or which ever color you prefer)
*tube of dark blue seed beads (to act as spacers)
*bead wire (.18mm in silver)
*Slide-in clasp (silver)
*jump rings (4) (silver)
*clamp beads (6) #1 (silver)
*needle nose pliers
*clamp pliers
*wire cutters
*Measuring tape

*Tip 1- Plan It Out* As with all jewelry designs I laid out the design on my bead board before I started doing anything. Had to try out different style gem stones to see which one matched best, as I did not buy any of the beads at the same time. This also includes making sure the clasp and clamp beads match the color pallet.

*Tip 2- Measure* Always measure for each project to make sure the lengths that fit best are correct. This is important when making items for other people. Once you have done them enough times you will know the required lengths and can skip this step.

Steps:

- Measure out the length of bead wire you will need to fit around your wrist comfortably and then give yourself about 2 inches to loop back through at the ends. Use wire cutters to cut correct length. Do this again.

-Take a pair of need nose pliers and open a jump ring. Slide the jump ring onto the ring of the clasp and close the jump ring. Do this again for the other ring.

-Repeat this last step for the other side of the clasp. Set aside once done.

*Tip 3- Tight Loops* Try and keep the loop as tight as possible to keep from having a big gap. This can be done by holding one end of the bead wire with a needle nose pliers and then taking the other end of the wire and pulling it tighter. Keeping it tight keeps the wire from rubbing. This is also why using a jump ring to attach to the clasp is important, as the wire attached to the jump ring is not going to move around much if its pulled tight.

 - Take a clamp and thread it on the bead wire; then slide the bead wire through the jump ring attached to the clasp. Loop the bead wire back through the clamp bead and then use the clamp pliers to clamp the bead in place. This should allow for a loop to hold the one end in place. (see *Tip 3*) Do this for both ends.

-Thread on the brackets and beads in the order of the design you picked ahead of time (see *Tip 1* ) Remember to do the same amount for each wire.

-Continue this until you have the length you determined earlier. (see *Tip 2* )

*Suggestion 1* Doing one clamp bead at the end to make sure everything stays tight and then another to create the loop is NOT required. You can choose to use only one clamp bead, just be sure to keep the beads together tightly enough to not end up with large gaps when you wear it. I do it for both ease and strength. Beginners can do this until they get better at re-threading the closure clamp.

*Tip 4 - Consider Material and Purpose* You must always be aware of the type of give and strength your supplies have or you could end up with breaks, scrapping, and no flexibility. The heavier the wire the less bend and flexibility it has. String the beads too tightly together and some will rub together and break. String them too tightly and the beads will bunch and not bend well around your wrist. Some times you need to allow for "give room" with bracelets in order to get the bracelet to wrap.

-Once you have finished your design for the length, slide on a clamp and use the clamp pliers to secure it in place. (see *Suggestion 1* and *Tip 4* ) (set aside for a second)

 - Grab your wire again. Take another clamp bead and thread it on first, then thread the wire through the jump ring on one side of the other end of the clasp. Then thread the wire back through the clamp. Now tighten the wire until you have a small loop. Be sure that the jump ring stays in the loop you create. Use the clamp pliers to close the clamp when you have the loop the size you want. (see *Tip 3* )

-Take a wire cutters and clip off the extra wire as close as possible to the last clamp bead. (If you didn't use two clamp beads you can do this next part.) If the wire is bend-able enough and the bead holes are big enough you can thread the extra wire back through the beads instead of cutting it.

-Repeat the last two steps for the other side of the clasp.

 -That will finish off the bracelet.

Black Flower Bracket Bracelet


Black Flower Bracket Bracelet

Supplies:

*2 strands of black flower brackets
*tube of translucent silver beads (or which ever color you prefer)
*tube of solid black seed beads (to act as spacers)
*bead wire (.18mm in silver)
*Slide-in clasp (silver)
*jump rings (4) (silver)
*clamp beads (6) #1 (silver)
*needle nose pliers
*clamp pliers
*wire cutters
*Measuring tape

*Tip 1- Plan It Out* As with all jewelry designs I laid out the design on my bead board before I started doing anything. Had to try out different style gem stones to see which one matched best, as I did not buy any of the beads at the same time. This also includes making sure the clasp and clamp beads match the color pallet.

*Tip 2- Measure* Always measure for each project to make sure the lengths that fit best are correct. This is important when making items for other people. Once you have done them enough times you will know the required lengths and can skip this step.

Steps:

- Measure out the length of bead wire you will need to fit around your wrist comfortably and then give yourself about 2 inches to loop back through at the ends. Use wire cutters to cut correct length. Do this again.

-Take a pair of need nose pliers and open a jump ring. Slide the jump ring onto the ring of the clasp and close the jump ring. Do this again for the other ring.

-Repeat this last step for the other side of the clasp. Set aside once done.

*Tip 3- Tight Loops* Try and keep the loop as tight as possible to keep from having a big gap. This can be done by holding one end of the bead wire with a needle nose pliers and then taking the other end of the wire and pulling it tighter. Keeping it tight keeps the wire from rubbing. This is also why using a jump ring to attach to the clasp is important, as the wire attached to the jump ring is not going to move around much if its pulled tight.

 - Take a clamp and thread it on the bead wire; then slide the bead wire through the jump ring attached to the clasp. Loop the bead wire back through the clamp bead and then use the clamp pliers to clamp the bead in place. This should allow for a loop to hold the one end in place. (see *Tip 3*) Do this for both ends.

-Thread on the brackets and beads in the order of the design you picked ahead of time (see *Tip 1* ) Remember to do the same amount for each wire.

-Continue this until you have the length you determined earlier. (see *Tip 2* )

*Suggestion 1* Doing one clamp bead at the end to make sure everything stays tight and then another to create the loop is NOT required. You can choose to use only one clamp bead, just be sure to keep the beads together tightly enough to not end up with large gaps when you wear it. I do it for both ease and strength. Beginners can do this until they get better at re-threading the closure clamp.

*Tip 4 - Consider Material and Purpose* You must always be aware of the type of give and strength your supplies have or you could end up with breaks, scrapping, and no flexibility. The heavier the wire the less bend and flexibility it has. String the beads too tightly together and some will rub together and break. String them too tightly and the beads will bunch and not bend well around your wrist. Some times you need to allow for "give room" with bracelets in order to get the bracelet to wrap.

-Once you have finished your design for the length, slide on a clamp and use the clamp pliers to secure it in place. (see *Suggestion 1* and *Tip 4* ) (set aside for a second)

 - Grab your wire again. Take another clamp bead and thread it on first, then thread the wire through the jump ring on one side of the other end of the clasp. Then thread the wire back through the clamp. Now tighten the wire until you have a small loop. Be sure that the jump ring stays in the loop you create. Use the clamp pliers to close the clamp when you have the loop the size you want. (see *Tip 3* )

-Take a wire cutters and clip off the extra wire as close as possible to the last clamp bead. (If you didn't use two clamp beads you can do this next part.) If the wire is bend-able enough and the bead holes are big enough you can thread the extra wire back through the beads instead of cutting it.

-Repeat the last two steps for the other side of the clasp.

 -That will finish off the bracelet.

Sunday, October 28, 2012

Blue Tones Necklace


Supplies:

*String of mixed tone gems
*White crystal seed beads
*Key Pendant
*bead wire (.24mm in silver)
*Toggle clasp
*jump rings (1)
*clamp beads (3) #2
*needle nose pliers
*clamp pliers
*wire cutters
*Measuring tape

*Tip 1- Plan It Out* As with all jewelry designs I laid out the design on my bead board before I started doing anything. Had to try out different style gem stones to see which one matched best, as I did not buy any of the beads at the same time. This also includes making sure the clasp and clamp beads match the color pallet.

*Tip 2- Measure* Always measure for each project to make sure the lengths that fit best are correct. This is important when making items for other people. Once you have done them enough times you will know the required lengths and can skip this step.

Steps:

- Measure out the length of bead wire you will need to fit around your neck comfortably and then give yourself about 2 inches to loop back through at the ends. Use wire cutters to cut correct length.

-Take a pair of need nose pliers and open a jump ring. Slide the jump ring onto the end of the clasp and close the jump ring.

- Take a clamp and thread it on the bead wire; then slide the bead wire through the jump ring attached to the clasp. Loop the bead wire back through the clamp bead and then use the clamp pliers to clamp it the bead in place. This should allow for a loop to hold the one end in place.

*Tip 3- Tight Loops* Try and keep the loop as tight as possible to keep from having a big gap. This can be done by holding one end of the bead wire with a needle nose pliers and then taking the other end of the wire and pulling it tighter. Keeping it tight keeps the wire from rubbing. This is also why using a jump ring to attach to the clasp is important, as the wire attached to the jump ring is not going to move around much if its pulled tight.

-Thread on the beads and gems in the order of the design you picked ahead of time (see *Tip 1* )
In my case I left the gems in the color order that they came in, but slide on a crystal seed bead in between.

-Continue threading on the beads until half way to the determined length (see *Tip 2* ) then slide on the pendant.

-Start threading the beads on like before, but backwards. The order of colors needs to go in reverse to make it look like its the same pattern flowing down to the pendant. (If you are doing blue, black, grey now you need to do grey, black, blue.)

-Continue this until you have the remaining half of the length you determined earlier. (see *Tip 2* )

*Suggestion 1* Doing one clamp bead at the end to make sure everything stays tight and then another to create the loop is NOT required. You can choose to use only one clamp bead, just be sure to keep the beads together tightly enough to not end up with large gaps when you wear it. I do it for both ease and strength. Beginners can do this until they get better at re-threading the closure clamp.

*Tip 4 - Consider Material and Purpose* You must always be aware of the type of give and strength your supplies have or you could end up with breaks, scrapping, and no flexibility. The heavier the wire the less bend and flexibility it has. String the beads too tightly together and some will rub together and break. String them too tightly and the beads will bunch and not bend well around your wrist. Some times you need to allow for "give room" with bracelets in order to get the bracelet to wrap. This can also mean you should use seed beads to give flex room in between certain types of stones, gems, rocks, and so on.

-Once you have finished your design for the length, slide on a clamp and use the clamp pliers to secure it in place. (see *Suggestion 1* and *Tip 4* ) (I almost always do this step just to secure my design and tightness of the beads.)


-Take another clamp bead and thread it on first, then slide on the other jump ring, then thread the wire back through the clamp. Now tighten the wire until you have a small loop. Be sure that the jump ring stays in the loop you create. Use the clamp pliers to close the clamp when you have the loop the size you want. (see *Tip 3* )

-Take a wire cutters and clip off the extra wire as close as possible to the last clamp bead. If the wire is bend-able enough and the bead holes are big enough you can thread the extra wire back through the beads instead of cutting it.

-Take a needle nose pliers and open the jump ring on the end you just finished and slide on the other end of the clasp (Or length of chain if you want to use that instead. *This is what I did for this necklace.* This will allow for different tightness around the wrist. This can be very helpful if you didn't follow *Tip 2* and its not long enough to go all the way around the wrist.) and close the jump ring with the needle nose pliers.

That will finish off the necklace.


Wednesday, August 1, 2012

Mix on the Stone


Supplies:*Turquoise mixed stones
*Metal seed beads
*bead wire (.24mm in silver)
*Bubble clasp
*jump rings (2)
*clamp beads (3) #2
*needle nose pliers
*clamp pliers
*wire cutters
*Measuring tape

*Tip 1- Plan It Out* As with all jewelry designs I laid out the design on my bead board before I started doing anything. Had to try out different style gem stones to see which one matched best, as I did not buy any of the beads at the same time. This also includes making sure the clasp and clamp beads match the color pallet.

*Tip 2- Measure* Always measure for each project to make sure the lengths that fit best are correct. This is important when making items for other people. Once you have done them enough times you will know the required lengths and can skip this step.

Steps:

- Measure out the length of bead wire you will need to fit around your wrist and then give yourself about 2 inches to loop back through at the ends. Use wire cutters to cut correct length.

-Take a pair of need nose pliers and open a jump ring. Slide the jump ring onto the end of the clasp and close the jump ring.

- Take a clamp and thread it on the bead wire; then slide the bead wire through the jump ring attached to the clasp. Loop the bead wire back through the clamp bead and then use the clamp pliers to clamp it the bead in place. This should allow for a loop to hold the one end in place.

*Tip 3- Tight Loops* Try and keep the loop as tight as possible to keep from having a big gap. This can be done by holding one end of the bead wire with a needle nose pliers and then taking the other end of the wire and pulling it tighter. Keeping it tight keeps the wire from rubbing. This is also why using a jump ring to attach to the clasp is important, as the wire attached to the jump ring is not going to move around much if its pulled tight.

-Thread on the beads and gems in the order of the design you picked ahead of time (see *Tip 1* )

-Continue this until you have the length you determined earlier. (see *Tip 2* )

*Suggestion 1* Doing one clamp bead at the end to make sure everything stays tight and then another to create the loop is NOT required. You can choose to use only one clamp bead, just be sure to keep the beads together tightly enough to not end up with large gaps when you wear it. I do it for both ease and strength. Beginners can do this until they get better at re-threading the closure clamp.

*Tip 4 - Consider Material and Purpose* You must always be aware of the type of give and strength your supplies have or you could end up with breaks, scrapping, and no flexibility. The heavier the wire the less bend and flexibility it has. String the beads too tightly together and some will rub together and break. String them too tightly and the beads will bunch and not bend well around your wrist. Some times you need to allow for "give room" with bracelets in order to get the bracelet to wrap. This can also mean you should use seed beads to give flex room in between certain types of stones, gems, rocks, and so on. (This will be important for these type of rocks.)

-Once you have finished your design for the length, slide on a clamp and use the clamp pliers to secure it in place. (see *Suggestion 1* and *Tip 4* ) (I almost always do this step just to secure my design and tightness of the beads.)


-Take another clamp bead and thread it on first, then slide on the other jump ring, then thread the wire back through the clamp. Now tighten the wire until you have a small loop. Be sure that the jump ring stays in the loop you create. Use the clamp pliers to close the clamp when you have the loop the size you want. (see *Tip 3* )

-Take a wire cutters and clip off the extra wire as close as possible to the last clamp bead. If the wire is bend-able enough and the bead holes are big enough you can thread the extra wire back through the beads instead of cutting it.

-Take a needle nose pliers and open the jump ring on the end you just finished and slide on the other end of the clasp (Or length of chain if you want to use that instead. This will allow for different tightness around the wrist. This can be very helpful if you didn't follow *Tip 2* and its not long enough to go all the way around the wrist.) and close the jump ring with the needle nose pliers.

That will finish off the bracelet.


Thursday, May 24, 2012

Shades of Color

I had a TON of crystal gem stones that came in strips of color combos. I had so many that I went on a bracelet frenzy. I even had the same color combos in small and regular crystals... as seen in these sets:


Now I am ALL for super easy projects. I make it a point to find things that are easier to make with and to use in general.
I love circle closures (like shown in the first picture). They are simple to string on when making the bracelet and they make it SO easy to put on. Magnetic closures are also very convenient to work with and put on. They are stronger than people think and make getting bracelets on ridiculously easy.
It seems to most people who make jewelry that they have an insane amount of supplies, and some things you aren't entirely sure what you had in mind when you bought them. I feel that way when it comes to seed beads. They are tiny and annoying. Plus I don't actually 'bead' anything with a needle and thread, which is what most sead beads are designed to be used in. I like to use them as spacer beads (as shown in both pictures). It keeps the crystal beads from rubbing against each other and breaking. I only get seed beads in standard colors and only get more when I only have like 3 left.

I use the standard rule of stringing when I make these bracelets. Very easy and basic.

Supplies:
-Crystal beads (set out in the pattern you want to string on)
-wire
-wire cutters
-clamps
-clamp pliers
-seed beads
-closure
-needle nose pliers

*Measure your wrist and cut wire about 5 inches longer than needed.
*Then find a clasp you like (in my case the circle closure clasp).
*Thread a clamp onto the wire; then the wire through the loop on the clasp and back through the clamp. (use the needle nose pliers to pull the loop tight)
*Press the clamp tight.
*Then thread the crystals and seed beads in the design order that you picked.
*Once you have gotten the length you need you need to slide on a clamp onto the wire and then wrap it around the loop of the clasp and finally back through the clamp.
*Squeeze the clamp closed.

Normally I end up with a few each beads (like 8 or 4) left over once I have reached my desired length. I use these to make earrings because its a very quick project that can use a small amount. This way I don't have to waste them. I try and make different types so it doesn't seem like all my bracelet/earring sets are the same. Some times I just feel like using the crystals for basic earrings and not a full set.


Most times however I like to use them all up and thats easiest done by making a bracelet. Hence why I have so many now....


Tuesday, May 22, 2012

Tutorials on 'Bracket' Bracelets

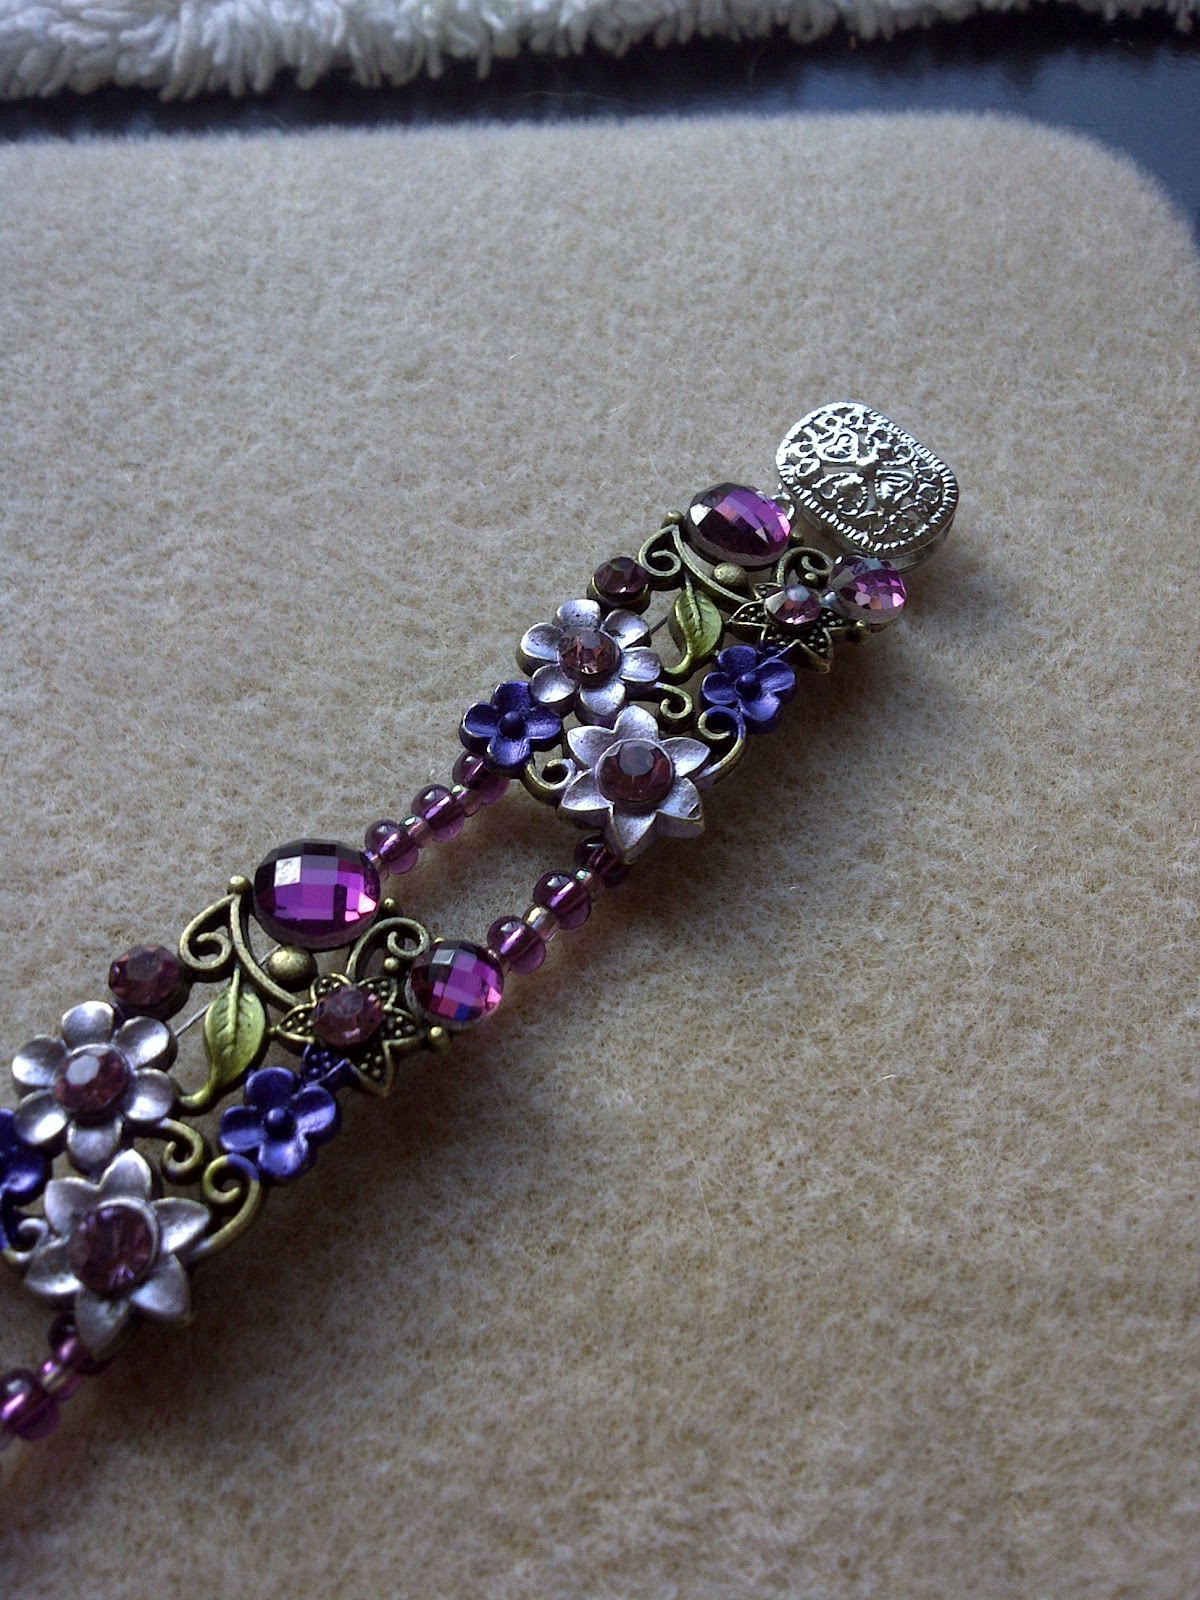
Once I figured out how to make the bracket bracelets work... I started going a little nuts with them. I made several more for myself. I also wanted to make one from the same purple bracket that I made for Mom. I figured I would make mine with pearls instead of glass beads.


I also found a few more butterfly brackets in blue and purple.


I also found a few longer bracket designs that I like.


They are incredibly easy to make too. Let me tell you how:

Supplies:
-Bracket designs (make sure to pick up as many as you will need)
-wire
-wire cutters
-clamps
-clamp pliers
-glass beads
-seed beads
-closure
-needle nose pliers

*Measure your wrist and cut wire about 5 inches longer than needed; then do it again.
*Then find a clasp you like (in my case the two ring clasp).
*Thread a clamp onto the wire; then the wire through the loop on the clasp and back through the clamp. (use the needle nose pliers to pull the loop tight)
*Press the clamp tight.
*Repeat the clamp steps if you have a second loop (like I did).
*Then thread the beads in the design order that you picked. I did two or three before sliding a bracket on. This allows for a little movement and doesn't push the bracket up onto the clasp. (especially if you used a regular one loop clasp)
*Thread about 5 glass beads and 4 seed beads in between each glass bead. That allows for a decent amount of space between the brackets and shows a visual pattern. 
*Once you have gotten the length you need you need to slide on a clamp onto the wire and then wrap it around the loop of the clasp and finally back through the clamp.
*Squeeze the clamp closed.
*Repeat those steps if you have a second loop on your closure.


Monday, May 21, 2012

Gifts for the Mom of my world!

Been several days since Mother's Day, but I wanted to show you all what I made for the best mother in the world (to me).

Mom had commented several times at Michaels that she liked these "bracket" designs. I took that as a pretty good sign that she would like what I had in mind to make.

I made the purple one first. I used two different size and color beads to act as spacers in between.


I did 5 big beads and 4 small seed beads in between each bracket. Makes for a more detailed look.


The brackets require a two wires to keep them flat, so I used a two prong slide in clasp.

I also got another set of "bracket" designs that has butterflies on either side. They are gold and copper, which is mom's favorite color next to blue. I found two very good different types of copper toned beads for the in between spaces.


The beads work great with the brackets. The only bad part of the copper bracelet is the slide clasp doesn't come in any other color, so it stands out.

I think they both worked out great. Mom loved them, so that made my day... as well as hers.

Friday, January 6, 2012

Lost Treasures

Around the middle of December I was doing some indepth cleaning and organizing and I discovered a bunch of pendants. They either didn't have chains or I simply forgot about them. Even found one I thought I had lost a long time ago. There was about 5 or 6, so I thought it would be a good way to use up the small beads I have.

I don't use seed beads for much of anything, but for some reason I always end up with a bunch. These necklesses wiped out about one tube for each neckless.


I have a pink cross and now I have a neckless that fits it.


I got a Chinese fish pendant from my mother  a few years back and never had a gold chain, so I made one that fits the colors in the pendant.


I had a two sided stone pendant that was on a leather strip, but it broke, so I thought this might be better.


This Chinese lucky pendant was actually part of a package that is for using on cards and scrapbooking, but I wanted to do something different. 


Forgot about my music pic pendant compeletly. Glad I have a neckless for it now.


I didn't have any more beads that I thought would look good with this clover pendant, so I just made a new chain.


From one little discovery I now have several new necklesses!