I haven't been able to get online in a while. Work has me working stupid and random shifts. Making it hard for me to get much, if anything done.
I was able to make a bracelet for my Mom along with some matching earings. I will try and get some pictures up on here and directions for you.
Just wanted to update you.

Thursday, April 7, 2011
Thursday, March 10, 2011
Copper bird bracelet
I have been feeling bored on my days off.... Oh yeah I got a part time job to make some money till I can get another career job. Other wise my parents might seriously kill me. LOL
Anyway I couldn't find a lot to do, so I thought I would try my hand at making some jewelry for myself. I had no trouble learning to make my own flower hair pins. I wanted to make a bracelet that would actually fit my fatter wrists, because not much does.
I found some cute accessory items at Hobby Lobby, which were 50% off (score!), and some copper chain that I wanted to use with it, also 50% off. Took me a little while to figure out how to do the beads that I wanted to add, but it came out pretty well.
Supplies:
 1.)wire cutter, rounder, and"squeeze" cramp.
 2.) 2'' head pins in copper to match the chain and other items (best to match ALL pieces so one doesn't look out of place)
 3,4,5,6.) Bird charm accessory, large rings, clip, and chain. (again all in the same color)
 7.) Find some beads that you think would match the theme you have, or just that you like the look.
 8.) I used plastic embellishments in the middle.
TO DO:
*I first took the chain and wrapped it around my wrist to figure out the length I wanted. I then marked that spot and plied the next ring off the chain to make it the length I wanted. (This is why I buy the longest chain available because the remaining can be used for other things)
*I wanted to put my two bird charms toward the ends and the plastic embellishments in the middle, so I counted my chain links (less the last two that would be the closer rings) to place them evenly.
*Took a headpin and wrapped one end into a circle, slide the bead on, and then took the other end and wrapped it into a circle as well.
*Take a ring and pry it open, slide in the charm, slide into the circle on the other end of the headpin, now pry close the ring. ***Will need to repeat 2,3 and 4th steps for other end.
*Take a ring and pry it open, slide into a chain link in the middle, slide on the plastic embellishment, pry ring closed. (I did this twice with different sizes)
All done.
This is what mine looked like when it was done. What do you think?


I still want to do a neckless, but haven't gotten around to it yet. I have noticed that the bird charms hang down a little too far. I might have to undo the bead part and just use a ring to hang the charm. I haven't decided if it bothers me enough to change it just yet. Think it might be a good idea?
Anyway I couldn't find a lot to do, so I thought I would try my hand at making some jewelry for myself. I had no trouble learning to make my own flower hair pins. I wanted to make a bracelet that would actually fit my fatter wrists, because not much does.
I found some cute accessory items at Hobby Lobby, which were 50% off (score!), and some copper chain that I wanted to use with it, also 50% off. Took me a little while to figure out how to do the beads that I wanted to add, but it came out pretty well.
Supplies:


TO DO:
*I first took the chain and wrapped it around my wrist to figure out the length I wanted. I then marked that spot and plied the next ring off the chain to make it the length I wanted. (This is why I buy the longest chain available because the remaining can be used for other things)
*I wanted to put my two bird charms toward the ends and the plastic embellishments in the middle, so I counted my chain links (less the last two that would be the closer rings) to place them evenly.
*Took a headpin and wrapped one end into a circle, slide the bead on, and then took the other end and wrapped it into a circle as well.
*Take a ring and pry it open, slide in the charm, slide into the circle on the other end of the headpin, now pry close the ring. ***Will need to repeat 2,3 and 4th steps for other end.
*Take a ring and pry it open, slide into a chain link in the middle, slide on the plastic embellishment, pry ring closed. (I did this twice with different sizes)
All done.
This is what mine looked like when it was done. What do you think?


I still want to do a neckless, but haven't gotten around to it yet. I have noticed that the bird charms hang down a little too far. I might have to undo the bead part and just use a ring to hang the charm. I haven't decided if it bothers me enough to change it just yet. Think it might be a good idea?
Thursday, February 24, 2011
Vintage is New
I am house/pet sitting while my parents are in Key West, Florida for Mom's medical conference. They will be back on Sunday... super late. Joy.
I found this great Etsy shop CafeBaudelaire. They have this French vintage bird print that I want so badly!


I found this great Etsy shop CafeBaudelaire. They have this French vintage bird print that I want so badly!

They also have this AMAZING vintage print Alice in Wonderland book.


I found these "Keep Calm" prints that I find funny.


I just can't help but find tons of prints that I seriously wish I could have! Check them out!


Saturday, February 19, 2011
Updated for the season
I foudn this great wood wreath at the ARC store for $0.35 and I "reface" it every season. I will add the pictures of the other versions once I find them!
I wanted something that was airy and matched the color/theme of the room as my Mom had it set up. Before I showed up... I think its pretty and a little fun.


I wanted something that was airy and matched the color/theme of the room as my Mom had it set up. Before I showed up... I think its pretty and a little fun.

Completed version

Used some medium white flowers, asmall bunch of light blue and white mix, with another small bunch of dark blue flowers.

I think the mix brings out the "beach side" feel in the bedroom.

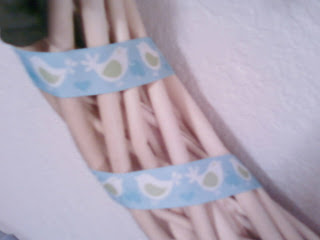
The ribbon I used around the whole wreath. I think its so cute, fun and lively.

Full completed wreath. I think the mixes work really well together. What do you think?
Stretch out
Stella has taken to sleeping stretched out. Its rather hilarious because alot of the time she buries her head under something... or one of the other cats. Its way too cute not to share!


This is the end with her head.... which ironically is where Gracie's butt is.

How she can breath with her head cramped in like that I have no idea.

LONG little kitty with her white go go boots.
One of the greatest things Mom and I have ever bought are these pillows that the cats like to sleep on. First Mom got the two we have laying on the floor by the sliding glass door. The cats, at that time were only Grace and Stu, LOVED them. They still use them all the time, except at night when they sleep with us. When I found out I got Stella I got a pillow for her to have when she would come to live with me... which ended up just being another pillow to have at my parents place. ALL the animals, including Lucy love to sleep on it.

Grace and Stella enjoying the pillows my Mom first got. They love to attack the button in the middle.

Stella just about covers the whole thing when she stretches out.

This is the pillow I bought for Stella, but as I said all the animals love it. Currently Stu is enjoying it.
Subscribe to:
Posts (Atom)